Showing posts with label Rice Preparation/Pilaf. Show all posts

Friday, 18 September 2015

Avarekaalu Akkitari Uppittu Made Using Borosil’s Digi Kook Rice Cooker- A Product Review


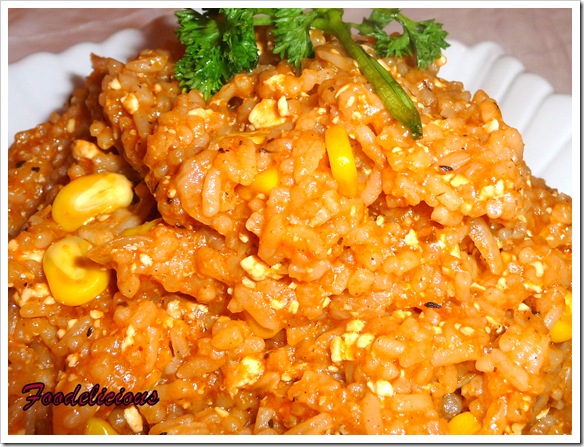
Foodelicious-Avarekaalu Akkitari Uppittu
Hi!
Here comes the last and final review of the three products, that I had received from Borosil . The previous two reviews can be read here and here.
I can very happily say that this product has become an innate part of my kitchen. My every day rice gets cooked in the Borosil Digi Kook Rice Cooker and I’m very happy with the outcome.
Not only is the rice cooker very sleek and smart looking, with a great finish but the final product cooked in it has always turned out very well. There are days when I get busy with work and the delay timer on the rice cooker has come to my rescue there.
I put the rice in the rice cooker with the delay timer ‘ON’ and get absorbed in my work. The delay timer helps me get a well cooked rice at a time I want. Once the rice gets cooked, it moves into ‘Keep Warm’ mode, so one always gets a hot rice on the plate. Sounds fuss free right!!

Wednesday, 4 June 2014

हरी मिर्च-अदरक के स्वाद वाले राजमा | Light to eat - green chilli and ginger flavoured Kidney beans & Jeera Rice | Lunch Combo-1 | Step Wise | No Onion & Garlic Recipe


DSC_0130-001

Hi all!!
The vacations have got over and the younger kid started his school. Can’t believe that the younger one is in 9th grade. He continues to be the carefree, careless lad and I continue to be the worried mother Sad smile. My prayers these days are largely for both my children, I hope and pray that they grow up into sincere, sensible human beings. The elder one has taken up photography seriously and wants to make a career in that. It’s his vacation time and he has been spending time with us. So, while he is around I ensure that I cook his favourites too and since he understands photography much better than me, pick up some photography tips as well , while I click.

Monday, 10 September 2012

Chana Dal Pilaf/ Khichadi; Winner Of Only Cooking From Royal Kitchen


DSC_2177-001


Hi All!
There are always days when you are not in a mood to cook an elaborate meal and what one is looking forward, is to have a one pot meal which is healthy and filling. I was also in such a mood today. For an unknown reason my right leg muscle has got pulled and I am not able to walk properly, so wanted to cook something very quick without straining the leg. S, was also going to come home for lunch as he has to travel on work for a few days, so I had to cook, there was no option of escaping..

Friday, 4 February 2011

Raw Green Chickpeas Biryani

013

Hi.

Winter is the season of greens and with that you can also see the fresh green chickpeas abundantly available. As a child and even today I love opening it from it’s pod and eating them raw as well as roasting them too. I also enjoy eating the saag made with it’s leaves which I will try to post sometime.

As a child, I remember carrying a small bunch in my hand and then eating it sitting on a dari in the courtyard while I drenched myself in some sunlight.

Wednesday, 14 July 2010

Sprouted Masoor Pilaf and Restaurant Style Punjabi Dal Fry | Step Wise | Gluten Free

P1030420
Hi!
There are days when you do not want to cook elaborately but the taste buds demand for tasty food. An option would be to make a one pot meal, another option can be to order out but this time I did not do either of that, I utilized things in my refrigerator and did cook an wholesome  combination. Today I am writing about a very interesting, extremely tasty and a healthy combo.
A few days back when everyone in the family had left for school and office, I finished my morning chores and sat down quietly on my bed. My thoughts took me back to about 20 yrs back when I was still a school going girl and my Mavshi (maternal aunt) and cousins had come to stay with us at my Mom’s place and all of us had gone to see the dam. While returning back it rained heavily and we had fun in rain and then played antakshari while we drove back home.
After reaching home, everyone was tired and the ladies in the house were surely in no mood to cook elaborately. My aunt initiated to cook and introduced us to this simple pilaf using Masoor while my Mom made the raita and fried some crispies.
I was suddenly extremely excited remembering this Pilaf and wanted to try it immediately. Though my aunt had used masoor directly, I thought of sprouting them to make the preparation more healthy. Along with the pilaf I made S’s all time favorite Punjabi Dal Fry or Dal Tadka. Whenever we go to eat out in North Indian restaurants, DH prefers to order this and the last few times the dal was not up to his taste, so I decided to pamper his taste buds.
The dal turned out extremely tasty and everyone was asking for more of it. S’s compliment was the best …he said, this beats any of these Punjabi restaurant preparation!!! So, if you are in a mood to try restaurant style, err sorry better than that dal fry, do try this, I will vouch for the taste! Pilaf is very light to eat and has no heavy flavors. We just loved it for it’s simplicity.

P1030394                                              Sprouted Masoor

Friday, 28 May 2010

Maavinkaayi Chitranna (Raw Mango Rice)– Recipe 1, Step Wise|Karnataka Cuisine

 
DSC_3871-001

Hello friends.
As I have mentioned earlier too that with the onset of summer the markets get flooded with Mangoes. We try to use mangoes in all forms whether it’s ripe or raw. I make many recipes using raw mangoes and this is S’s favorite. He had reminded me several times that I had not prepared this and his favorite Maavinkayi chutney which I have posted earlier.
Today I decided to please him so I made this Chitranna, which is a preparation with rice. Now when it comes to regional recipes from Karnataka my ultimate source is my MIL so to re-affirm the recipe I called her up and am glad I did that because she gave me more variations to the basic recipe, I thought mentally ‘Sone pe Suhagaa’. This is the very basic recipe and the  many variations  which I learnt will surely post gradually.


Friday, 26 March 2010

Fenugreek Fried Rice ….Indo-Chinese Version

P1020435
Hi!
I used to experiment a lot with the basic Chinese sauces during my college days, which has reduced considerably now a days. I would use them in making sandwiches, salads and many more things, sadly half of them I do not recollect now. During one of those experiments I made this rice and was genuinely impressed with my culinary skills. At that age getting complimented for a good preparation makes you feel so proud, so I also took no time to reach cloud nine and this became a secret recipe to impress guests and friends…LOL surely this  was a super hit amongst all who tasted it.
Whenever I would make this rice and carry it in my lunch box, I would rarely get to taste it, all my friends would attack my lunch box and finish it off..to top this was my friend A who herself is an excellent cook. Both of us love to talk about food and can spend hours discussing it. She would always ask for this recipe and I would give her a rough idea how I made it. So A, here’s your favorite preparation, I hope you will treasure it as much as I do.
The fenugreek imparts a very subtle aroma to this preparation and does not overpower the taste buds with it’s bitterness. The preparation is light to eat and extremely flavourful. It’s a good way to make children eat the fenugreek. This recipe is my personal recommendation, so do try it once!!
Ingredients
3 cups cooked rice
2 cups Fenugreek leaves (plucked)
2 onions sliced
4  super seasoning cubes
2 tsp white pepper
2-3 tbsp green chili sauce
2 –3 tsp soya sauce
oil for cooking
salt to adjust
Method
Heat oil add onions and saute till transparent.
Add the washed fenugreek leaves and saute, cook till the leaves wilt.
Add the crushed super seasoning powder and white pepper. Mix properly, add soy sauce and green chili sauce. Cook on high flame, add rice and mix. Add salt if required.


food2-5

This rice can be a complete meal in itself. Relish when served hot.
P1020432

Sunday, 14 February 2010

Corn-Cottage Cheese Risotto and Grilled Broccoli

P1020289
Hello Friends.
Valentine’s day is a special day for people in loveheart and I can see the blogosphere flooded with dessert and chocolate recipes spreading all the sweetness…smile_teeth I also wanted to post something sweet but then decided completely against that.. and here I am posting two very tasty recipes which perfectly complemented each other! The true reason is I did not want to indulge myself in elaborate preparations as I am still recuperating..
I had made these two preparations for the dinner. S had demanded the Broccoli preparation. A few years back we had had this in a restaurant called Salt n Pepper in Andheri, Mumbai and had simply loved it. Risotto was completely my idea and is truely my version and I am glad I experimented. The last time I had made risotto I did not have the patience to add the stock gradually but this time I did it and the end result…I had that sticky kind perfectly made.I have used the small grain rice that I use at home..one is free to use the Arboreo rice.
Making a good risotto is rather like riding a vehicle for the first time, it takes a little bit of practice to begin with, and a certain amount of attention thereafter. Risotto’s are also very sensitive to timing, and this is why what is served in a restaurant (no matter how good it is) will rarely display that rich texture and just-right doneness that a good home-made risotto will.
The Brocolli I had cooked in grill-micro combination, the taste was nice and it had imbibed all the marinade but I will use 50-50 version the next time to avoid the slightly dry texture which I got this time. I surely like mine extra moist… Sending this combo to the COMBO EVENT  hosted here.
P1020280
Ingredients for  Grilled Broccoli
2 Broccolis separated into flowerets
3/4 cup thick curds
1 tsp cumin pwd
2 tsp coriander pwd
2 tsp chili pwd
1/2 tsp garam masala
1/4 tsp turmeric
2-3 tsp garlic-ginger paste
salt to taste
Chaat masala
Method
Blanch the Broccoli.
In the thick yogurt mix all the ingredients except the broccoli. and prepare the marinade.
Now mix the broccoli in the marinade and coat it properly with it. Leave aside for an hour and then insert it in the satay sticks, smear it with some butter  and using the grill-microwave function grill for 10-15 mins. Just before serving sprinkle some chaat masala.
food

P1020269 
Ingredients for the Risotto
2 cups small grain rice
1 onion chopped
4-5 baby corns sliced
200g corn kernels
200g tomato puree (I used Kissan tetra pak)
about 150g cottage cheese crumbled
2 tsp each of  dry basil, thyme and Oregano
4 tbsps extra virgin olive oil (EVOO) for cooking
4 garlic pods chopped
2 tsp of Paprika
1 tsp white pepper
about 8-10 cups of vegetable stock
Method
Wash the rice and soak for 10 mins.
In a pan take EVOO and heat it…add onions and chopped garlic. Once the onion turns translucent add the baby corns and corn kernels, saute.
Add the tomato puree, salt, herbs, parika, pepper and mix. Remove the water from the rice and put the rice. Mix it properly with the tomato sauce.
Add a cup of water at a time, once it gets absorbed add the next and so on..till the rice gets cooked and releases the starch. Cooking should be done in an open pan at no point it should be covered.
Once the rice is half cooked add the cottage cheese and continue cooking using more veg stock. At the end add some butter and give a final toss. The entire process of making the risotto can take time anywhere between 20-30mins.
food1

How was the end result? I am writing this post an hour after dinner. Now, after reading this post S is going back to have another round of Risotto.. clap Need I say more…??!!
Wish every one a very happy Valentine’s Day…lets get together and spread the message of love.rose

Wednesday, 3 February 2010

My 100th Post Jackfruit Biryani & Raita …and an event announcement

P1020091

Hi Friends!  I am surely at the top of the world as I type my 100th Post. Last few days have been mind boggling as I was slowly heading towards a century and  was still undecided what I should  post. I wanted the recipe to be special so I kept debating with myself as the recipe names kept floating in my brain…gateux..cheesecake…savory….dessert… I was thoroughly confused errrgh. Thinking 
Amongst all this confusion I decided that it’s time I host my first event and my head started working on the theme for the event. After a lot of thought I decided on  Combo. The minute my theme was decided I knew what I had to post ….My first entry to my first event Jackfruit Biryani and Raita. 
Before I head towards the recipe and the rules for the event I want to thank  each and every blogger friend who have been kindly sending me their responses and comments  for my recipes, it means a lot to me.  Each and every blogger has an expertise in some form of cooking and their tips and notes have helped me learn so much more. It has been a good learning journey where I tried my  hands on various cuisines making myself more adept. Blogging has become a part of my life where I learn new recipes every day which has given me a platform to improvise and concoct my own versions. At the same time I have made pals around the globe whom I have never met and yet they have become a part of my life. I wait for their comments to come and when I read and answer their comment I get the feeling that I am talking to them IN PERSON.
As I had mentioned in my 50th post too I never thought I could post so many recipes but at my 100th post surprisingly I know  I still have many more to share.Surprised I still have to try my hands on so many cuisines and have to win over the “yeast ghost”.  I am still learning the art of writing good posts which are informative and at the same time entertaining. Writing is an art and I confess it has never been my cup of tea but I am surely trying… I admire so many bloggers who write so well, hence it will be unfair on my part to name just one..but I am learning from all you guys. Thank you so much.
Coming back to my today’s post….. A few days back I got hold of freshly cut raw jackfruit. I had been planning to make a biryani with it for quite sometime but always ended up making something else. This time I thought of surprising S with a biryani for lunch. I must confess I was a bad planner this time, I had just 1-1/2 hrs for S to come for lunch and was wondering how fast can this be cooked….?Eye-rolling I was literally running in my kitchen trying to complete two steps of the preparation simultaneously at the same time. Frying with one hand and grinding with the other, the last thing that I wanted was to get disturbed….my elder son watching me work frantically asked me what are you cooking? To which I managed to  answer wait till Pappa comes… Surprise …Surprise!!! But I surely surprised myself as I managed to finish the elaborate procedure in the allotted time and gladly served it for lunch….. I can boast about myself….right!!!LOL
Ingredients For Biryani
Recipe Courtesy- Sanjeev Kapoor which I have modified to suit our taste.
500 gm Raw Jackfruit cut into pieces
1-1/2 cups Basmati rice soaked
4 medium onions thinly sliced
3 medium tomatoes chopped
2tbsp ginger-garlic paste
1-1/2 cups yogurt whisked
1 bunch coriander leaves chopped
1 bunch fresh mint torn
2 tbsp milk
5-6 strands of saffron dissolved in 7-8 tsp milk
1 tbsp Kewra water
oil for deep frying
3-4 tbsp ghee/clarified butter
salt to taste
Spices
4  green cardamom
4 black cardamom
4 cloves
2-1” pieces of cinnamon
1/2 tsp shahjeera
2 tsp cumin pwd
3 tsp coriander pwd
1 tsp turmeric pwd
3 tsp red chili pwd
1 tsp garam masala
Method
Deep fry the jack fruit and onion slices and keep them separately.
foodblog2-14 
Meanwhile soak the rice for 15-20 mins and then drain. Boil the rice 6 cups of water along with 2 cloves, cardamom, black cardamom, 1 cinnamon and some salt, cook till it’s almost done, remove in a colander.
foodblog2-15
Heat 3 tbsp ghee and add the shahjeera followed by the remaining whole spices. Add the ginger-garlic paste and saute, now add all the spices except the garam masala and mix. Tip in the tomatoes and salt to taste (enough for the jackfruit curry), once the tomatoes are mushy add the chopped coriander then  remove the pan from the flame and add the curds and garam masala,  mix. Removing from flame is important as the curd curdles otherwise. Put the pan back on the flame and cook the masala, add the fried jackfruit and cook till it attains a  semi gravy texture.
foodblog2-16
Now comes the final part …layering the Biryani. Take a rice dish and grease it. On the base spread half of the Jackfruit curry then spread half the rice put half of the chopped mint leaves (I used mint powder as I was short of them but fresh mint is recommended). Sprinkle half of the kewra water and saffron milk. Repeat the layers again. Take a satay stick and pass it through the layers at 5-6 places. Pour a few drops of ghee there. This is an optional step but surely yields a better flavor and moistness to the Biryani. Cover the dish with an aluminium foil and bake in a preheated oven at 180C for 20-25 mins.
foodblog2-17 
Serve hot with mix veg raita. For veg raita  mix small quantity of tomato, onion, cucumber in a cup of thick yogurt. Add a finely chopped green chili and a little chopped cilantro. Also add some salt, rock salt and a pinch of sugar. Mix properly and then add some water to adjust the consistency. Chill the raita before serving.
P1020100
This Biryani is the best option for meat lovers who have turned vegetarian and obviously the hard core vegetarians to enjoy veggie-meat biryani. The raita is  the most appropriate accompaniment to the spicy biryani.
Note- Do not skip the Kewra water as it adds an amazing flavour but at the same time an excess quantity can spoil the taste.
Now that I have crossed one big milestone in blogging I thought of celebrating the same by taking up a new challenge and aiming for a new milestone. I have been participating in various events but never hosted a one. So here I am hosting my first event to celebrate my first BIG MILESTONE. I invite all my blogger friends  and non blogger friends to participate in this and make it success.

           THE  COMBO  EVENT

image
We always read in a post that this tastes best when served with this. For eg in a chana masala post one might say it tastes best when served with bhatoora/ puri/ jeera rice. So the Chana-Bhatoora/ Chana-poori or Chana –rice  makes a combo. Sarson da saag is served with makke di roti, Bhakri with stuffed baingan and Noodles with Manchurian . A combo can be as simple as sambhar-rice,  rasam rice or even Roti and some curry. One can share their Paratha Combo’s.
In starters …a starter is served  with a dip, similarly in desserts ..a brownie is served with a vanilla ice-cream, fruit custard with jelly and so on…..
So use your creativity, pick any cuisine of your choice and send me your combos which you feel and guarantee gel with each other.
Rules for the event

  1. Post any vegetarian combo meal between 3rd Feb-10th March. Eggs can be used but  non veg entries will not be accepted as this  is a vegetarian blog.

  2. One can send maximum of  three entries.

  3. Old posts can be reposted and linked with the event announcement page.

  4. New Posts to be linked back to the event announcement page.

  5. Picture of size 300 pixel showing the combo together is essential.

  6. Use of logo is compulsory.

  7. Send the entries in the given format to cookingoodfood@gmail.com
a. Your Name
b. Blog’s Name
c. Blog’s url
d. Blog post
e. Cuisine
f. Post link-
g. a picture of the combo
  8. Non blogger’s can email me their recipe and the pic.
For any queries kindly mail me. I will post the Round-up by 18th March unless I am caught in something more important.

Friday, 22 January 2010

Soybean and Carrot Pilaf

Hello Friends! Today I am not in a mood to write much. Just want to say this a very healthy pilaf which incorporates the health benefits of both Soy and the carrots. I have explained in detail the health benefits of Soybean in Soybean and Rice adai. It’s a simple to make and flavourful rice.
Ingredients
2 carrots grated
1 large onion chopped
3/4 cup soaked  and parboiled Soybeans
2 cups basmati rice
2 garlic pods finely chopped
mix of ghee+oil for cooking
some fresh scraped coconut for garnish
1/4 tsp turmeric
1 tsp red chili pwd
Spices
2 tsp red chili flakes
2-3 star anise
4-5 cloves
3-4 bay leaves
1 cinnamon
2 black cardamom
1/4 tsp garam masala
Method
Soak the rice for 10 mins. Heat oil+ghee in a pressure cooker pan and add all spices except garam masala and red chili flakes. Now add the garlic followed by chili flakes. Immediately add onions and saute. Now add the Soybeans and saute for few mins. Add the grated carrots and mix. Add salt to taste, turmeric, chili pwd and rice. Mix and fry in oil for 2 mins . Now add the water and garam masala. Put the lid of the pressure cooker but do not put the weight. Cook the pilaf till the water is used and the rice is cooked completely. Serve hot with raita of your choice.
P1010831
Pilaf goes to Anita’s APS-RICE event.

Sunday, 8 November 2009

Methi Bhaath /Fenugreek Rice (Karnataka style)

clip_image002[9]

Hi Everyone. Today I am posting yet another hit recipe from Karnataka. As you all know I have learnt all Kannadiga recipes from my MIL. In my family every body likes Fenugreek leaves very much and now as we are getting good supply of the same I am indulging myself in cooking S’s all favorites with this leaf.
As I mentioned in my last post too, my blog will see more recipes with greens. This particular recipe is a favorite of S and my elder one. S has become extremely busy in his office and hardly has time for  the family. I with my ongoing health problems feel dejected at times with no one around the whole day…especially S.. But that does not keep me away from cooking his favorites, so whenever strength permits I am in the kitchen cooking for every one. Some times I wonder if I did not had this blog and my blogger friends, life would be so boring  and so monotonous… I know I am sounding very low and sad…which I am!!! But believe me friends this sadness does not affect the taste of the food I cook, so one can surely try my recipes without any fear.Smile
This bhaath asks for cooking the vegetable (palya) separately first with extra oil, masala and salt  and then mixing it with the rice. So now you can understand why I mentioned the extras…
The palya can be made in advance and then mixed with rice at the time of serving. Makes a complete meal in itself. This can be a good preparation when you are expecting guests too as it saves time.
It can be served with curds, a yogurt based raita, chips or just by itself.
Nutritional facts  about  Fenugreek
The active constituents of fenugreek seed include iron, Vit. A, B1, C,phosphates, flavonoids, steroidal saponins (diosgenin, yamogenin, tigogenin, and neotigogenin), trigonelline, and other alkaloids.
Sapogenins found in fenugreek also lower serum triglycerides, total cholesterol (TC), and low-density lipoprotein cholesterol (LDL-C). Diosgenin and tigogenin (saponins) are chemically similar to estrogen and steroidal harmones. These help balance female hormone levels and perhaps help compensate for the lack of them after menopause. Soluble fiber helps control blood sugar levels, making it useful for diabetics

Ingredients
Serves -4
a bunch of fenugreek leaves chopped
3-4 potatoes cut into small cubes
1 cup of peas
4-5 tbsp Palya pudi (this is a regular kannadiga subzi masala)
3-4 green chilies chopped
2 tbsp mix of urad-chana dal
1 tsp mustard seeds
3/4 tsp turmeric pwd
extra oil for cooking
extra salt
cooked rice ( I used 1-1/2 cup raw rice)

For Palya Pudi or Check here

Bedagi chili- 1 cup
coriander seeds – 1/4 cup
Chana dal and Urad dal - 1/4 cup each
Cloves-2
Cinnamon-2 big sticks
dry coconut- 1/2 cup
Roast all the ingredients in a tea spoon oil and then grind together to a powder.

Method
clip_image002[7]
Keep all the vegetables ready.
P1010440 Heat extra quantity of oil add the mustard followed by urad-chana dal, once it turns golden brown add the green chilies.
P1010442
Add in the potatoes and turmeric pwd, saute .
P1010443
Add the peas and mix properly.
P1010444
Add in the fenugreek leaves and salt.
P1010445
Throw in the palya masala (read above for the recipe).
P1010446
P1010450
Mix in properly and cook covered till done. One has to ensure that the salt, oil, masala are added in extra quantity so when the Subzi (palya) is mixed with rice, the flavors are adequate.
clip_image002
Mix the palya with rice and serve. How much Palya one wants to mix is his/ her personal choice and as per taste, but at the same time one has to check that the rice does not feel dry and  taste bland.
Serve hot with a dollop of ghee/ clarified butter.
Sending this to think spice-think turmeric hosted by Sudeshna of Cook like a bong and is the brain child of Sunita.
Think Spice: Think Turmeric
I am also sending this curry to MLLA-17 hosted by Sra at when my soup came alive and is the brainchild of Susan of The well seasoned cook,
to EFM - Variety rice series  conducted by SriLekha

Monday, 2 November 2009

Avarekaalu Akkitari Uppittu…Avarekalu Upma with rice and coconut…a speciality of Karnataka

clip_image002
Avarekalu in Kannada, Mochai in Tamil, Lima/Hyacinth beans in English, Surati Papdi in Gujarati and  Popati/Vaal in Maharashtra are the few names that I know of. These  beans are very popular in Karnataka. I was introduced to them just prior to my marriage by my MIL. I had not realised then that these are very popular in Karnataka and a lot of preparations made with them. These are so popular there that in Bangalore a place where these are sold abundantly is called avarekalu square. You can see many women sitting there separating the beans from the pods and selling them on the roadside. They are normally abundantly available in the winter. These beans have a distinct flavor which is thoroughly enjoyable.smile_tongue
During my recent visit to B’lore I bought them and stored them in the freezer as these are not available here. S is a die hard fan of these seeds…I guess all Kannadigas are. I will be posting the recipes gradually as and when I cook with them.
This weekend when I made this Upma my first step was to call MIL and ask her to repeat the recipe. One big change in now her telling me the recipes is, she does not tell me any proportions unlike earlier when I would ask her for each and every ingredients quantity and ratio. I guess she has realised I have finally found a grip on Kannadiga way of cooking….
Though she has found a confidence in me, I am the one a little apprehensive preparing them as somewhere in my mind it’s there will I be able to make it as good as her?…will S like it? By God’s grace I have normally succeeded in making things as good as her, so S does not complain.Smile
The Upma turned out really tasty and to my understanding S overate the stuff so much that he ate very little for the lunch. It is one such preparation that can be had for breakfast, lunch, dinner or  brunch too, as it’s quite filling. I will  stop praising the dish now and give you the recipe…………
Ingredients
1 cup raw rice (any brand)
3-4 spoons pigeon peas/arhar dal
1 cup avarekalu
1 cup fresh coconut
3-4 tbsp chopped cilantro
7-8 green chilies finely chopped
2-3 strings of curry leaves finely chopped
oil to cook
2 tsp mustard seeds
3 tbsp mix of urad and chana dal (black lentil and bengal gram)
salt to taste
a dash of ghee for taste

Method
P1010381
Thaw the avarekalu.
P1010380
Grind together the rice and pigeon pea to a semolina like texture.
P1010382
Heat oil add the mustard, followed by the urad-chana dal, roast till golden brown in color. Now add the chopped chilies, curry leaves and cilantro.

P1010383
P1010385
Add the rice-dal powder and saute them in oil for a few minutes.

P1010386
Add the avarekalu and mix.

P1010387
P1010388
Add freshly grated coconut and mix properly. Add the salt and mix again.
P1010384
Keep about 4 cups of water to boil.

P1010390
P1010391
Add water gradually and keep mixing, add water based on the quality of rice. I required about 3-3/4 cups of water. Cover and cook till done.
P1010393
Mix a large spoon of clarified butter/ghee before serving.
clip_image002[5]
Sending this to Steady Pulse…Beans and Legume recipe you can count on.pulse_logo and to MLLA-17 hosted by Sra at when my soup came alive and is the brainchild of Susan of The well seasoned cook,
to EFM - Variety rice series  conducted by SriLekha
and to
hosted by EC at Simple Indian Food

LinkWithin

Related Posts with Thumbnails